Once you’ve reinstalled or re-enabled the EZP Chrome Extension, the next step is to grant EZP access in Seller Central. This step is critical because it gives us the permissions needed to:
Connect our system with your Seller Central account.
Create and manage your listings.
Prepare and send your shipments to FBA.
Amazon has recently updated its permissions process, but we’ve made it easier. With the blue button inside Seller Central, you can grant almost all required permissions in just one click.
Log in to your Amazon Seller Central account.
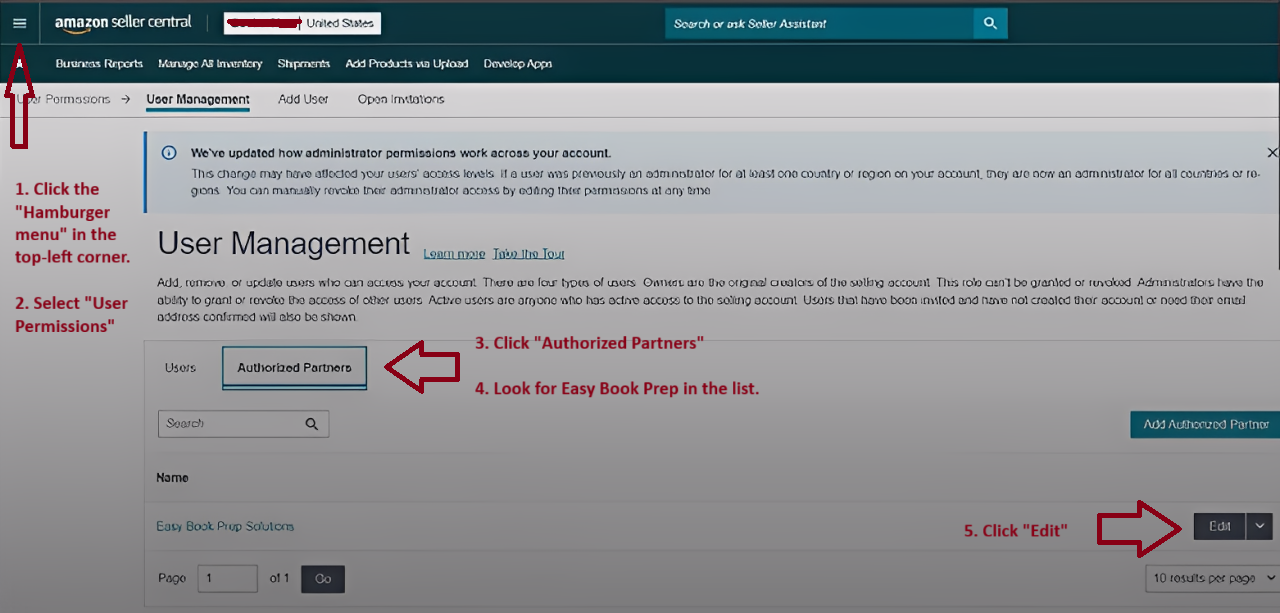
Click the hamburger menu (three stacked horizontal lines at the top-left).
From the dropdown, go to Settings → User Permissions.
On the User Management page, click on the Authorized Partners tab.
In the Authorized Partners tab, look for EasyBookPrep.
On the far right, click Edit.
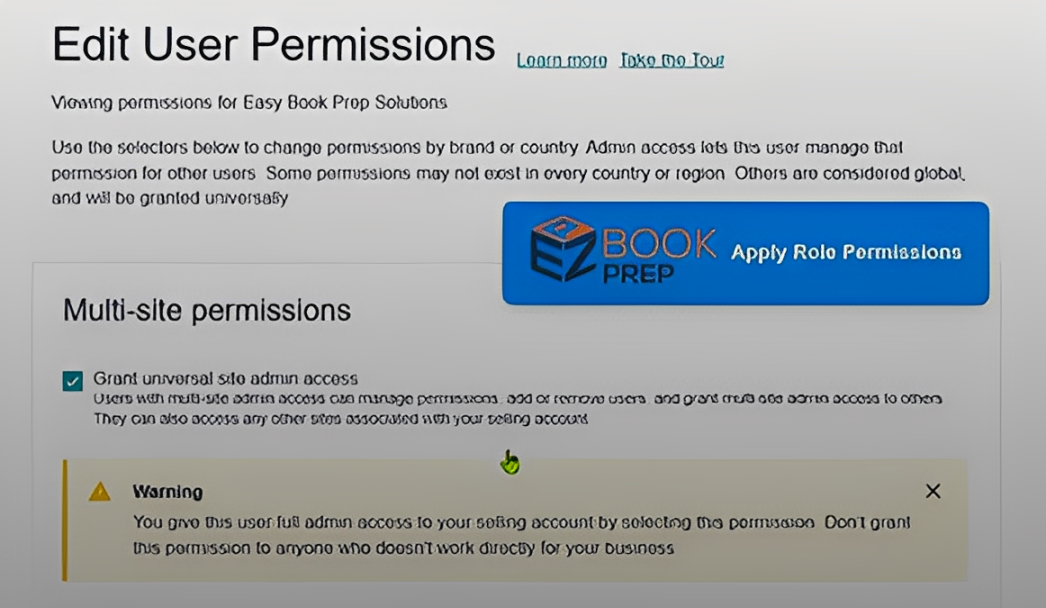
A new Edit User Permissions page will open.
At the top, you’ll see a big blue button that says Apply Role Permissions (this is part of the updated Chrome Extension).
Click the button — this applies nearly all permissions automatically.
After using the blue button, you may see different messages:
Unchecked items (not highlighted in red) → These are usually optional and safe to ignore.
“Permissions not found on the page” → This is normal. Ignore unless it is marked in red.
Red-highlighted “Verification Failed” messages → These are important and must be handled manually.
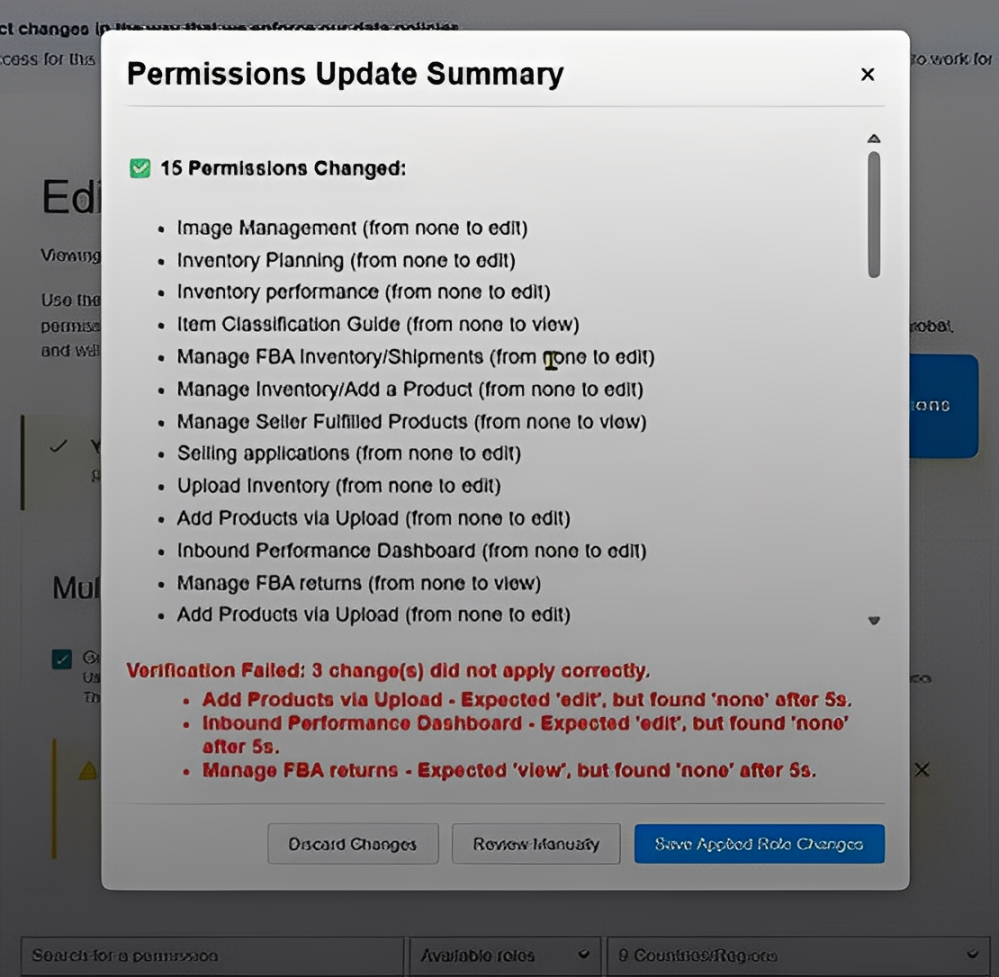
On the same page, click Review Manually.
Use CTRL + F (Windows) or Command + F (Mac) to search for the red Verification Failed text.
Next to each failed item, click Edit.
Update or re-confirm the access.
Save changes.
 If some items still fail after manual review, that’s okay. Save your changes anyway, then let EZP Support know which items couldn’t be saved.
Blue button doesn’t appear
→ Scroll further down the page. Amazon sometimes hides this section.
Red “Verification Failed” won’t go away
→ Save changes anyway and notify EZP with the list of failed permissions.
EZP tools missing on Amazon product pages
→ Double-check that you re-enabled the EZP Chrome Extension first. Without it, access won’t connect correctly.
Q: What does the blue button do?
A: It grants most permissions all at once, making the setup much faster.
Q: Do I need to fix every unchecked box?
A: No. Only the red-highlighted “Verification Failed” items need your attention.
Q: What if I can’t fix a failed item?
A: Save changes as-is and contact EZP support with the details.
Q: Do I need to repeat this process often?
A: No. Once granted, permissions usually stay active. Amazon may occasionally ask you to reconfirm.
How to Install the EasyBookPrep Chrome Extension and Find Your Authorization Code
How to Reinstall or Re-Enable the EZP Chrome Extension After an Update
How to Reinstall the Updated EZP Chrome Extension (Error Indicator Method)
Granting EZP access in Seller Central is a quick but essential step. Use the blue button to approve most permissions instantly, then manually review only the red-highlighted “Verification Failed” items. If some permissions cannot be saved, that’s fine — just let EZP support know.
 For help: [email protected]
 Live chat: help.easybookprep.com
